So I mentioned before that I had moved (way back at the end of March). The move resulted in a tiny bit more space, but more importantly, the layout drastically improved in our new apartment. Well technically it is a condo, not an apartment (what's the difference, anyone know?) but anyway. In our old apartment the master bedroom was where our bed was and where I had all my stuff as well (the boy used the second bedroom as his office). I had some bookshelves and an old student desk to work at. I found the setup inconvenient and I almost never did my crafting at my desk. Instead I setup TV trays in the living room when I wanted to work on things. In this place, because the size of the smaller bedroom would make the boy claustrophobic if it was his office and we can't put the bed in the same room with the boy's computer because I can't fall asleep when he's next to me screaming about hoards of zombies in his game, it means that the master bedroom is a dual office. He gets half the room for his books and computer and I get half for my books and crafts. Thus I present to you my crafting corner!
As much as I would have liked to buy a nice fancy L or U shaped desk for my new craft zone, I tried to save money and re-purposed things that I already have. Between my old desk (which I should mention was a Kmart purchase about 15+ years ago) and a table we used in the old kitchen, I got a good L shape going. I use TV trays as needed for extra space. I also need to do a bit of cleaning but it harshes my mellow man. ;) I'm really happy with my corkboard to-do thingy. Provides inspiration in the event that I sit down and don't know what to do.
Despite the abundance of cooking posts I have also been working on my crafts and I will be sharing my progress with you shortly.
Until next time!
My craft experiences, etsy favorites, and anything else that catches my fancy!
Monday, May 28, 2012
Saturday, May 26, 2012
Cooking Week 21: Crepes
This week's theme is French which I was thrilled about. I don't know if I've mentioned it before but the boy and I went to Paris a few years ago and I loved everything about it- especially the food! After I spent most of the week debating what to make I finally settled on Crepes with sugar and butter.
They aren't as good as the ones I had in Paris, but eating them still reminded me of walking around the streets, taking the metro, and falling face first into the middle of the street because that's just the sort of clutz I am.
Before I share the recipe I suppose I should share what I made for last week's challenge.
Yeah...That's burned rice. Like really really burned brown rice. It was going to be the start of a fried rice dish but instead we had takeout that night. I like to call this dish Fire Rice! and yes the exclamation point is important. I made brown rice once more since then and undercooked it. Obviously I need some serious brown rice practice.
Anyway, back to delicious crepes. I grabbed the recipe from Le Cordon Bleu cookbook (because hey- Le Cordon Bleu) and followed the sweet crepe recipe.
3/4 c. flour, 2 T. sugar and a pinch of salt sifted into a bowl. My sugar and salt is too coarse so it doesn't really sift well, but the flour is the most important bit. Make a well in the center and crack 2 eggs into it, add 1/2 t. vanilla, and 1/3 c. milk.
Whisk together until smooth and add 3 T. melted and cooled unsalted butter and 2/3 c. milk. Whisk together until combined.
Let batter rest 30 minutes at room temp.
When ready to make the crepes brush a crepe pan with melted butter. I think I used an omelette pan and I melted the butter right in the pan because I was lazy. Pour some crepe batter in the pan and swirl to cover. The book says 2T but I was using closer to 1/4 c. Cook until golden brown on one side and flip and cook the other side.
Butter lightly and sprinkle with sugar then fold in four. Eat and dream of Paris!
They aren't as good as the ones I had in Paris, but eating them still reminded me of walking around the streets, taking the metro, and falling face first into the middle of the street because that's just the sort of clutz I am.
Before I share the recipe I suppose I should share what I made for last week's challenge.
Yeah...That's burned rice. Like really really burned brown rice. It was going to be the start of a fried rice dish but instead we had takeout that night. I like to call this dish Fire Rice! and yes the exclamation point is important. I made brown rice once more since then and undercooked it. Obviously I need some serious brown rice practice.
Anyway, back to delicious crepes. I grabbed the recipe from Le Cordon Bleu cookbook (because hey- Le Cordon Bleu) and followed the sweet crepe recipe.
3/4 c. flour, 2 T. sugar and a pinch of salt sifted into a bowl. My sugar and salt is too coarse so it doesn't really sift well, but the flour is the most important bit. Make a well in the center and crack 2 eggs into it, add 1/2 t. vanilla, and 1/3 c. milk.
Whisk together until smooth and add 3 T. melted and cooled unsalted butter and 2/3 c. milk. Whisk together until combined.
Let batter rest 30 minutes at room temp.
When ready to make the crepes brush a crepe pan with melted butter. I think I used an omelette pan and I melted the butter right in the pan because I was lazy. Pour some crepe batter in the pan and swirl to cover. The book says 2T but I was using closer to 1/4 c. Cook until golden brown on one side and flip and cook the other side.
| As you can see my swirling is not always the best. |
Butter lightly and sprinkle with sugar then fold in four. Eat and dream of Paris!
Friday, May 11, 2012
Cooking Week 19: 4 Ingredient Spanish Rice
One of my go-to meals fit in perfectly with this week's challenge of 5 ingredients or less. I love making Spanish rice because its easy and I always have the ingredients in the house.
The 5 ingredients are:
1 lb of ground beef
1/2 onion, diced
1 can of diced tomatoes (standard size, 15 ounces ish)
1 cup rice (white or brown)
You start by browning the ground beef with the onions (salt and pepper beef as desired, these don't count as ingredients).
Add rice and mix. Add can of tomatoes. Add water as directed by package but just a little less to account for liquid in tomatoes. For my brown rice it was just a little less than 2 cups of water.
Bring liquid to a boil, reduce to a simmer, and cook as directed by rice package. For this time it meant my brown rice had to cook for 50 minutes.
Serve and eat!
The 5 ingredients are:
1 lb of ground beef
1/2 onion, diced
1 can of diced tomatoes (standard size, 15 ounces ish)
1 cup rice (white or brown)
You start by browning the ground beef with the onions (salt and pepper beef as desired, these don't count as ingredients).
Add rice and mix. Add can of tomatoes. Add water as directed by package but just a little less to account for liquid in tomatoes. For my brown rice it was just a little less than 2 cups of water.
Bring liquid to a boil, reduce to a simmer, and cook as directed by rice package. For this time it meant my brown rice had to cook for 50 minutes.
Serve and eat!
Friday, May 04, 2012
Cooking Week 18: Quinoa Salad
I DESPISE all dressings. Either they are of the creamy sort, which I hate, or they have vinegar, which I also hate. I still love salads though. The deliciousness of the veggies are plenty for me, I don't need to drown them in some other flavor to enjoy them. No matter how much I like them, however, it wouldn't be particularly exciting to post a picture of a plain green salad for salad week. Instead I pulled out the box of Quinoa that's been sitting in my cabinet for at least 6 months waiting for me to work up the courage to try something new and came up with this:
I made the Quinoa according to the box's instructions but used chicken broth instead of water. When it was cooked, I chilled it then threw in some other things. I cooked and crumbled a few pieces of bacon, chopped up a tomato, shredded some asiago, drizzled some olive oil, and sprinkled some garlic on. I shook it all up and ate it chilled and I am now a Quinoa fan. Delish!! I'm going to add more tomatoes in before I eat the leftovers, because I thought it could use a bit more.
Thursday, April 26, 2012
Cooking Week 17: Childhood Biscuits and Gravy
I am firmly entrenched in the Midwest, however my grandparents come from West Virginia and as such I grew up with a number of southern foods despite my physical location. I absolutely love anything that involves biscuits. My all time favorite meal that my grandmother makes is biscuits and underwater rice. As no one else I currently eat with shares that love, however, I made my my second favorite grandma meal- Biscuits and Gravy.
I don't follow a precise recipe, but I start out by browning 1 lb. of spicy sausage (I like the kick but grandma uses regular)
Then I estimate how much fat is in the pan- this time I guessed 2 Tbsp. and add an equal amount of flour. Whisk together and add 1 c. of milk for every 1 Tbsp of flour. After I did this I determined that I wanted more gravy than what was there so I added 1 Tbsp. butter, 1 Tbsp. flour and another 1 cup of milk. Stir all together and cook until it thickens.
Pour your gravy over your favorite biscuit recipe (or in my case quick Bisquick biscuits) and enjoy a taste of the south.
I don't follow a precise recipe, but I start out by browning 1 lb. of spicy sausage (I like the kick but grandma uses regular)
Then I estimate how much fat is in the pan- this time I guessed 2 Tbsp. and add an equal amount of flour. Whisk together and add 1 c. of milk for every 1 Tbsp of flour. After I did this I determined that I wanted more gravy than what was there so I added 1 Tbsp. butter, 1 Tbsp. flour and another 1 cup of milk. Stir all together and cook until it thickens.
Pour your gravy over your favorite biscuit recipe (or in my case quick Bisquick biscuits) and enjoy a taste of the south.
Wednesday, April 18, 2012
Cooking Week 16: Prosciutto Wrapped Asparagus
Ahh my pickiness strikes again. I don't like asparagus. Despite that I gave it a go for the challenge anyway. I figured- hey its been years since I had it, maybe I like it now. No such luck. I'll share the recipe anyway since I think its a good one if its something you might like :)
I found it here.
Really simple. Take some asparagus, prosciutto, and cream cheese.
Spread the cream cheese lightly on prosciutto and wrap it around a sprig or two of asparagus.
Placed on a lightly sprayed baking sheet and bake at 450 for 15 minutes and enjoy- or in my case don't.
I found it here.
Really simple. Take some asparagus, prosciutto, and cream cheese.
Spread the cream cheese lightly on prosciutto and wrap it around a sprig or two of asparagus.
Placed on a lightly sprayed baking sheet and bake at 450 for 15 minutes and enjoy- or in my case don't.
Sunday, April 15, 2012
Cooking Week 15: One Pot Mac and Cheese
I still haven't managed to settle into a routine at the new place, but I managed to throw together a crockpot mac and cheese for this week's challenge.
I wasn't totally thrilled with how it turned out, it didn't get a great sauce. I think it may be the dubliner cheese that I used? Who knows. I'm not going to bother with the recipe, but if you really want it speak up and I'll share!
Saturday, April 07, 2012
Cooking Week 14: Sloppy Joes
Ahh Sandwiches! One of my many many food loves. I'd say at least half of our meals involve some sort of sandwich. I wanted to go out on a limb and make something fancy, but as I'm still catching up on real life I went with one of my old standby's- good ol' sloppy joes.
I of course served them on homemade buns (recipe found here)
The joes themselves are one pound of ground beef browned with 1/2 a diced onion and 1/2 a diced green pepper. Add 1/4c. ketchup, 8oz. tomato sauce, some Worcestershire sauce, pepper, salt, garlic powder, and chili powder. Mix until heated through and serve!
I of course served them on homemade buns (recipe found here)
The joes themselves are one pound of ground beef browned with 1/2 a diced onion and 1/2 a diced green pepper. Add 1/4c. ketchup, 8oz. tomato sauce, some Worcestershire sauce, pepper, salt, garlic powder, and chili powder. Mix until heated through and serve!
Sunday, April 01, 2012
Cooking Week 13: Russian Piroshki
Sorry I've been MIA this past week or so. The hassle of moving means no internet and little time for posting once I did get it. It also means I didn't get to either of my challenges until the very end of the week, but I did get them done. In cooking this week the challenge was Russian. After perusing some websites of Russian food I finally settled on Piroshki which is basically a Pasty. Traditionally there are a variety of fillings that go into these delicious pockets, but I settled on ground beef and onions based on the tastes of the boy and I.
I used the recipe found here and the only thing I changed is I subbed garlic powder for dill and I baked at 400 for 17 minutes instead of frying them.
Basically you whip up a bread like dough
Cook your filling and let it cool.
Fill the pockets
Brush a beaten egg on top to help them brown in the oven.
Then bake and eat!
I used the recipe found here and the only thing I changed is I subbed garlic powder for dill and I baked at 400 for 17 minutes instead of frying them.
Basically you whip up a bread like dough
Cook your filling and let it cool.
Fill the pockets
Brush a beaten egg on top to help them brown in the oven.
Then bake and eat!
Friday, March 23, 2012
Cooking Week 12- Cheesy Apple Beer Bread
I move tomorrow. This means that even though I managed to make the bread on Sunday, this is my first time being able to sit down long enough to write the post. It also means that I may be able to do the baking challenge a week late, but likely not. For Cheese I decided to make a cheesy beer bread which I had been planning on making for a while.
I used a recipe from Cooking light and adapted it slightly to compensate for my laziness.
Mix 13.5 ounces of all purpose flour, 3 Tablespoons of sugar, 2 teaspoons of baking powder, 1 teaspoon of salt, a shake of black pepper, and a few shakes of garlic powder in a bowl.
Add 1 bottle of hard apple cider and 1 c. of grated cheese. I used dubliner because it was on sale and I LOVE the stuff :) Mix until moist and combined.
Spoon into greased 9x 5 loaf pan and pour 1 Tablespoon of melted butter on top.
Bake in a 375 degree oven for 35 minutes. Pour another Tablespoon of melted butter on top and bake for another 15-25 minutes until deep golden and toothpick in center comes out clean.
Thursday, March 15, 2012
Cooking Week 11- Breakfast Mini Cinnamon Rolls
I wobbled on what exactly to do for this week. I LOVE breakfast so to pick one is hard, but I finally wound up deciding on these mini cinnamon rolls that I've seen online lately. I must say, I'm glad I did, they are delicious and easy too!
First you roll out the premade crescent dough (I use Trader Joe's brand) and smush the lines together to make them into 4 rectangles.
Then you spread butter on them and sprinkle them with cinnamon sugar (I have some premade at all times for cinnamon sugar emergencies).
Roll from the long end to create a cylinder and cut each log into 5 pieces.
Place in a greased mini cupcake pan and bake at 350 for 10 minutes, or follow the baking instructions in the link.
Whip up the powdered sugar icing in the link (or one one of your own), frost, and eat. Try not to eat them all!
First you roll out the premade crescent dough (I use Trader Joe's brand) and smush the lines together to make them into 4 rectangles.
Then you spread butter on them and sprinkle them with cinnamon sugar (I have some premade at all times for cinnamon sugar emergencies).
Roll from the long end to create a cylinder and cut each log into 5 pieces.
Place in a greased mini cupcake pan and bake at 350 for 10 minutes, or follow the baking instructions in the link.
Whip up the powdered sugar icing in the link (or one one of your own), frost, and eat. Try not to eat them all!
Monday, March 12, 2012
Baking Week 11-Savory Potato Bread
Yet another semi-fail from my magazine file. I grabbed this one from an issue of Cooking Light and I threw out the recipe so I can't tell which one. It was a prize winning potato bread and staying true to my Irish heritage, I love me some potatoes. In any and all forms.
I gave this recipe a whirl and while it rose VERY nicely I was somewhat disappointed in the final product.
It was a little too soft and didn't have enough structure to it. I also didn't mash my potatoes smooth enough, but that's my fault.
I think I'll try again with smoother potatoes and a different recipe I think. Therefore no recipe share. Find your own with good reviews. ;)
Friday, March 09, 2012
Baking Week 10: TV inspired Starfleet Combat Rations
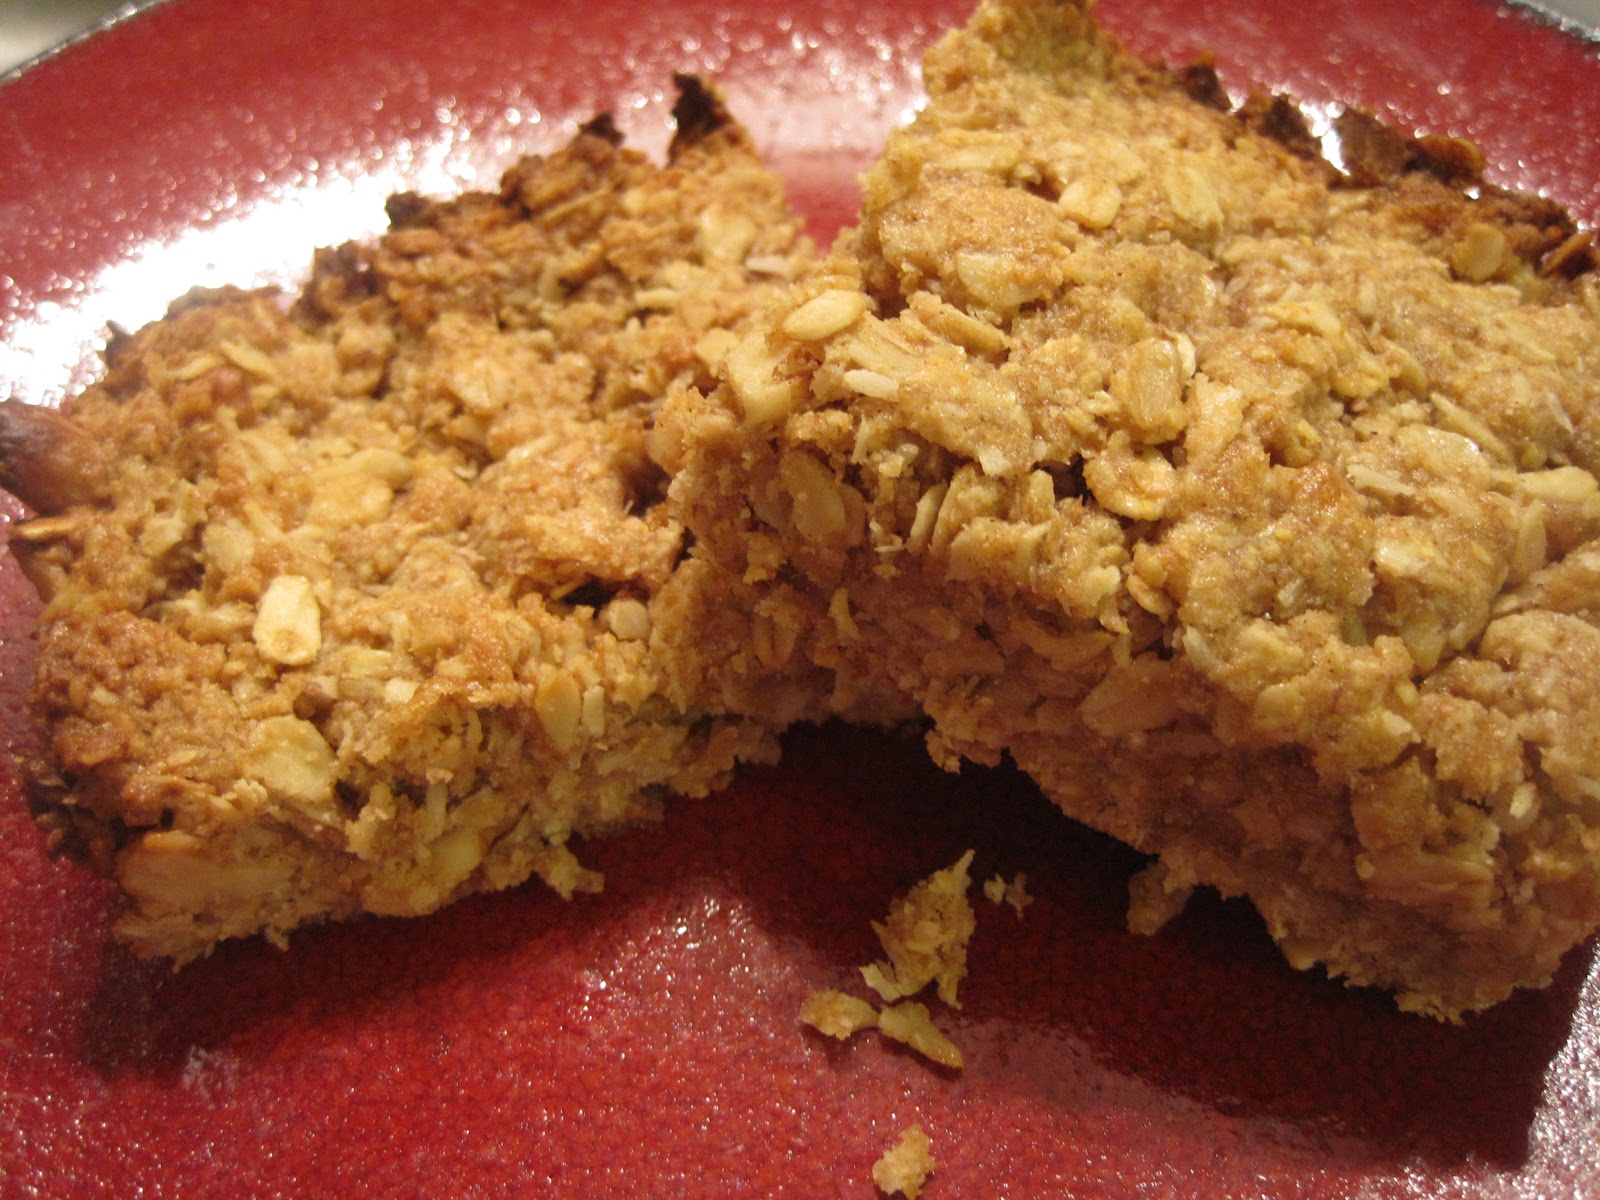
Have I revealed myself as a total nerd on here yet? Cuz I am. In my quest to watch all of Star Trek, I've been rewatching DS9, which I think is my favorite. In the episode entitled The Seige (which I will not go into details about so as not to spoil it) Miles O'Brien mentions his love of Starfleet combat rations. Since I'd been toying around with ideas for this week's baking challenge and simultaneously trying to figure out what snack to make to bring with me on my flight to NYC next week, it was a light bulb moment for me. I'd make combat rations! Well in this case granola bars.
I adapted the recipe found here for my preferences and based on the suggestions in the comments.
First I mixed 2 c. rolled oats, 1/2 c. brown sugar, 1/2 c. wheat germ, 1 tsp. cinnamon, 1 c. wheat flour, 1/2 c. unsweetened coconut shreds, 1/2 coarsely chopped walnuts, and 3/4 tsp. salt.
Then you make a well in the center and mix in 1/2 c. honey, 1/2 c. oil (I use canola), 1 egg (beaten), and 2 tsp. vanilla.
Pat mixture in a greased 13x 9 pan. You can see I leave about 2 inches at the end so that my bars are thicker and chewier.
Bake in a preheated 350 degree oven for about 15 minutes, until the edges start to brown.
Cool for 5 minutes then cut and enjoy when you wish.
When telling the boy about my combat ration plan he suggested that I just make him poptarts and pipe the federation symbol on top because he wants everything he eats to be federation approved. :| I thought about piping it on thegranola bars combat rations I made, but frankly I got too lazy. I also imagine TRUE combat rations would be a little less sweet and a little more protein-y.
I adapted the recipe found here for my preferences and based on the suggestions in the comments.
| The honey is in there already because I forgot to take a picture first. |
First I mixed 2 c. rolled oats, 1/2 c. brown sugar, 1/2 c. wheat germ, 1 tsp. cinnamon, 1 c. wheat flour, 1/2 c. unsweetened coconut shreds, 1/2 coarsely chopped walnuts, and 3/4 tsp. salt.
Then you make a well in the center and mix in 1/2 c. honey, 1/2 c. oil (I use canola), 1 egg (beaten), and 2 tsp. vanilla.
Pat mixture in a greased 13x 9 pan. You can see I leave about 2 inches at the end so that my bars are thicker and chewier.
Bake in a preheated 350 degree oven for about 15 minutes, until the edges start to brown.
Cool for 5 minutes then cut and enjoy when you wish.
When telling the boy about my combat ration plan he suggested that I just make him poptarts and pipe the federation symbol on top because he wants everything he eats to be federation approved. :| I thought about piping it on the
Subscribe to:
Posts (Atom)